1. Barbie and Ken Costume Tutorial

    October 24, 2014 ♥ Posted in: Cosplay, Kristina Makes Things, Outfit of the Day by Kristina Horner

    KEN&BARBIE_TOP

    Generally when I am making costumes, I enlist the help of awesome online tutorials for the more difficult parts of the process. However, while making Barbie and Ken costumes (of the Toy Story 3 variety) for my boyfriend and I this Halloween, I found basically nothing to help me on my journey, so I had to figure it all out myself.

    Toy-Story-3-Barbie-and-Ken

    I decided I would, in turn, help the rest of you out trying to make these costumes yourselves by showing you what I did!

    First, Barbie. Hers is the easy one.

    barbie

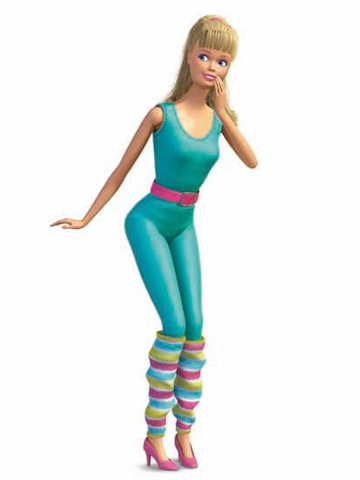
    I basically bought every piece of the costume online and assembled it – pretty simple! The pieces you need are:

    1. Stretchy blue one-piece (I bought this one). The picture at this link shows the solid, matte blue one (like she wears in the movie) but the metallic one is what came in the mail. I was a bit disappointed, but luckily this metallic one is what the actual barbie doll version of Barbie wears, so it will do just fine!

    2. A pink belt or any belt that’s got the right buckle, painted pink – if it’s a leather belt, make sure to use leather paint (which you can buy at Joann’s or most other craft stores). I found mine online ages ago, but there are usually extensive belt sections at secondhand stores, so you’ll likely find something.

    3. A pink scrunchie (I bought mine at Claire’s).

    4. Pink pumps (I got mine at Payless Shoe Source).

    5. Striped leg-warmers. Unfortunately this is the difficult part. I commissioned mine from a knitter I know (Bananavenger on Twitter), so that’s always an option – but you can always use these rainbow ones in a pinch.

    That’s it! Barbie is ready! Now on to the slightly more difficult one, Ken.

    Ken_Carson


    So! The first thing about Ken’s costume to note is that none of it is stuff you’re likely to find online or at Goodwill. If you do, more power to you. I couldn’t, so I made it all myself.

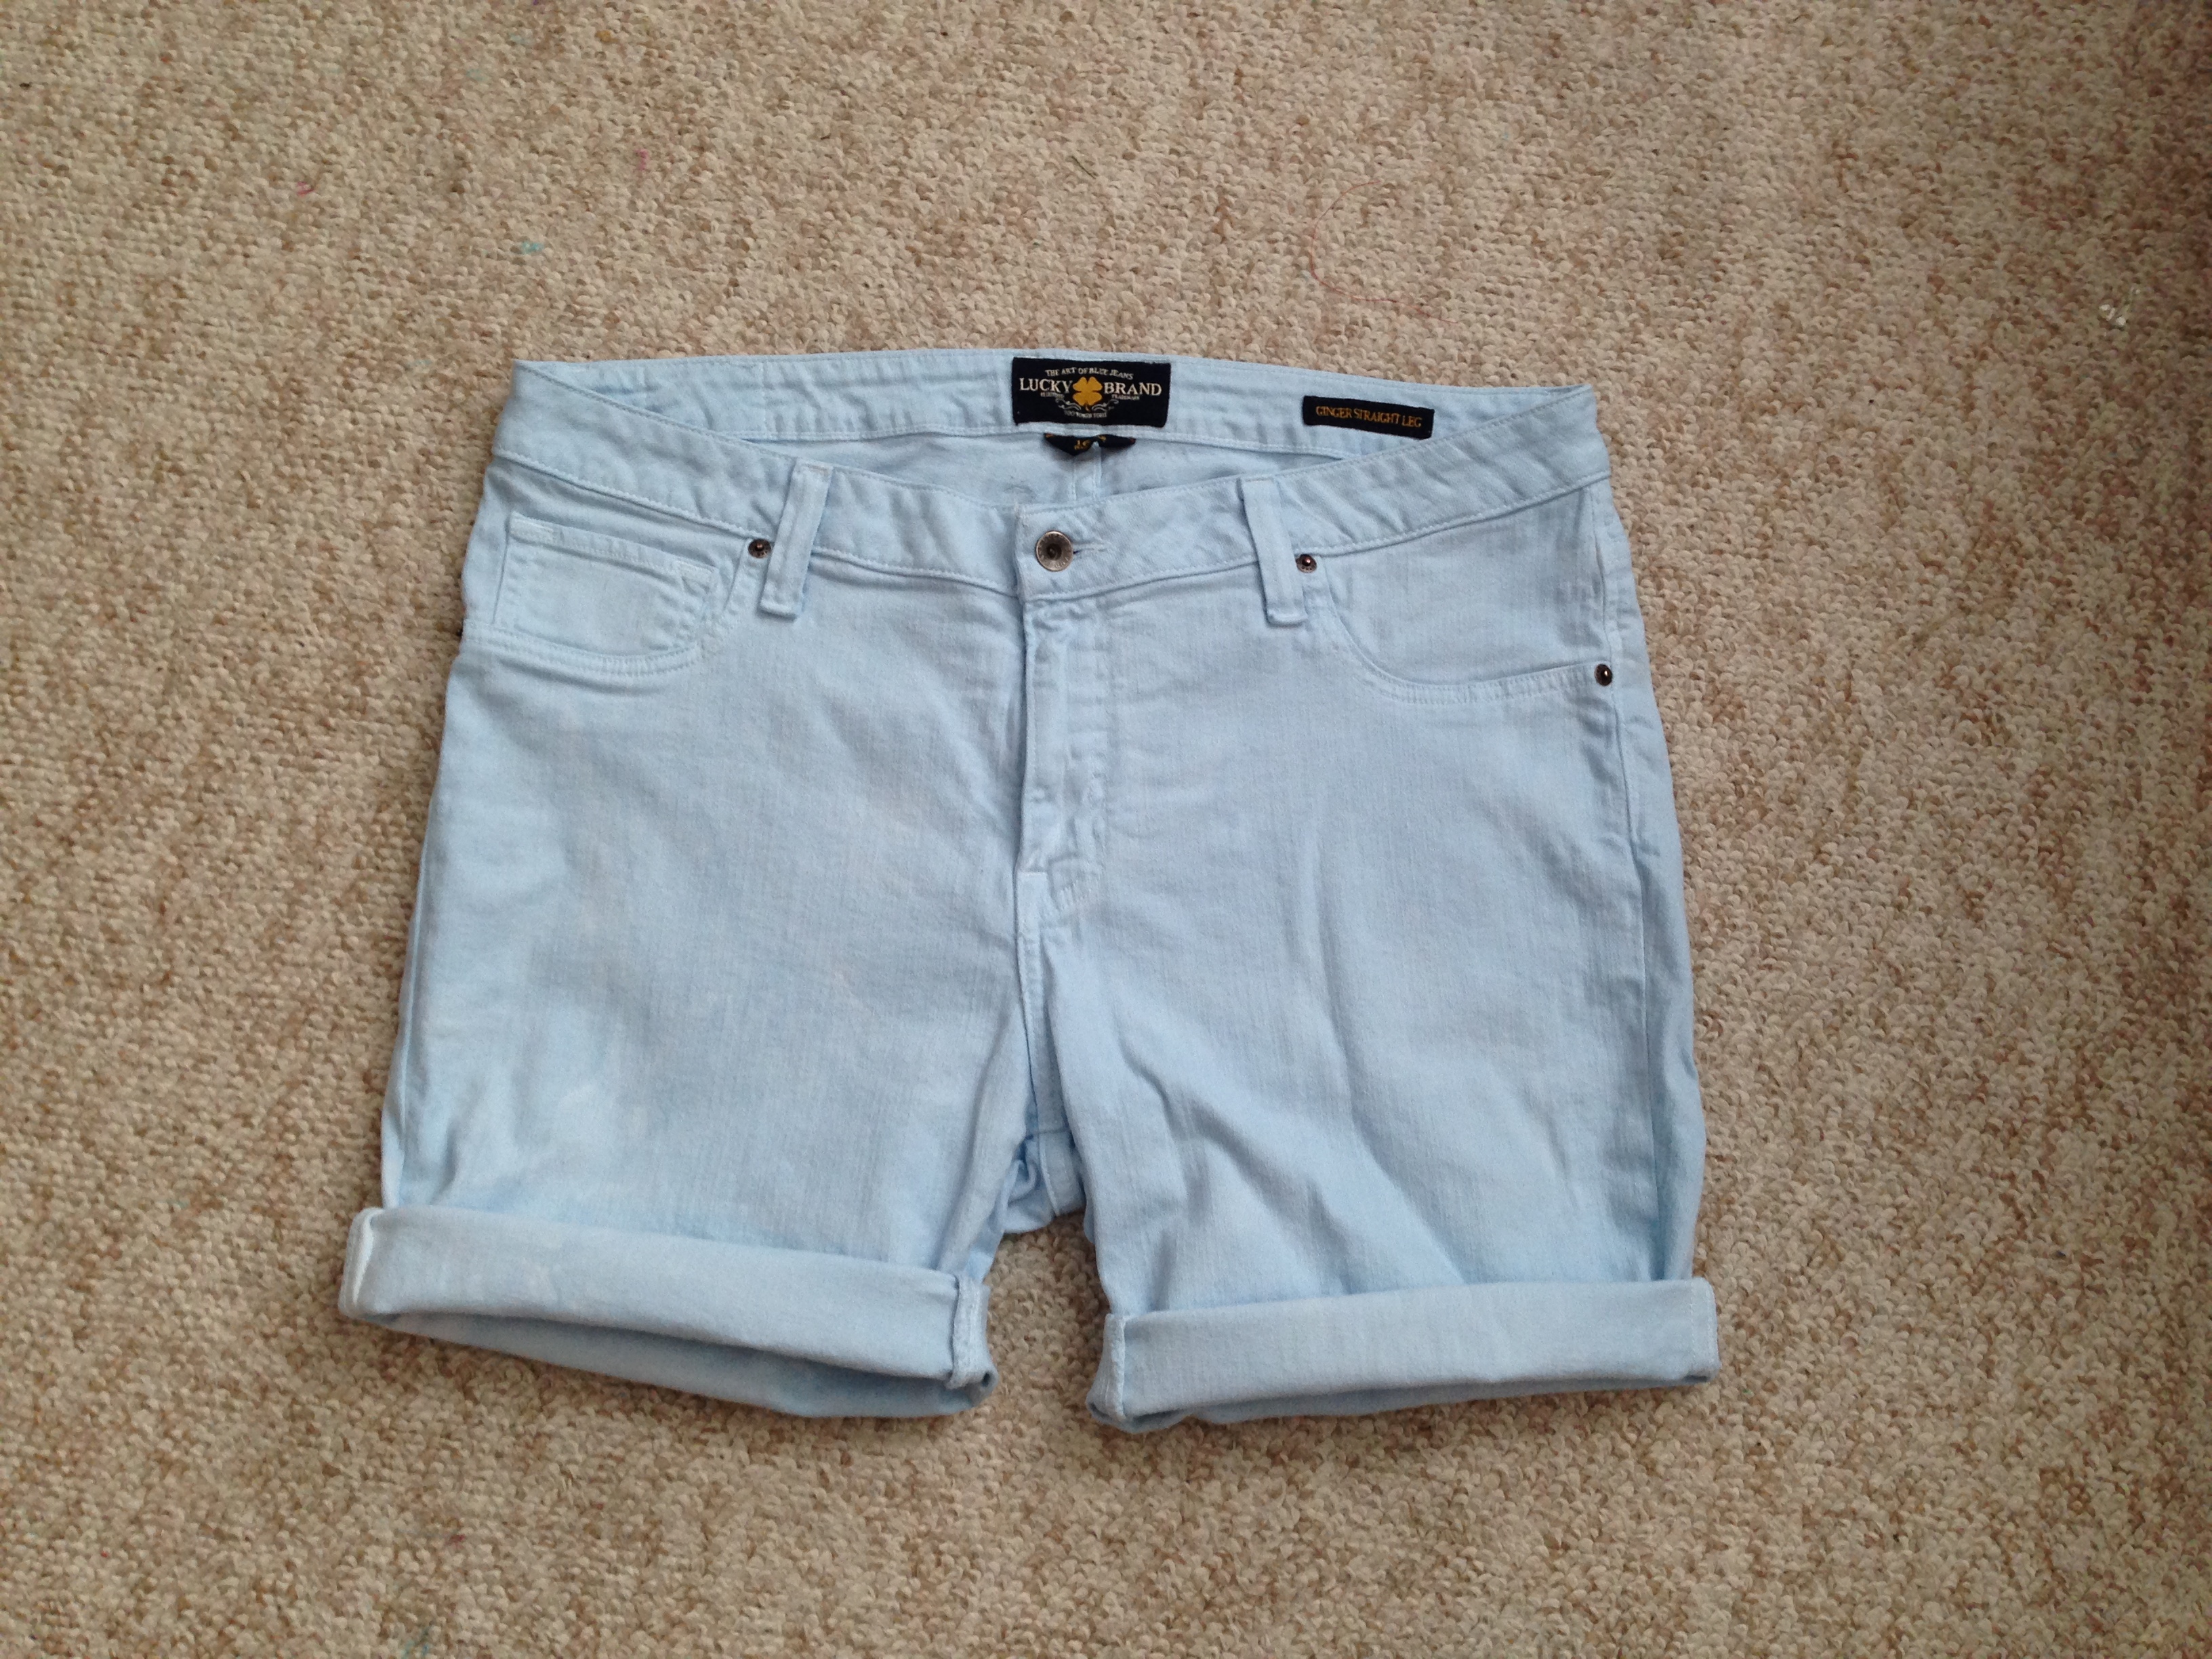
    I couldn’t find any button down shirts or pants or shorts even remotely the right blues, so I went with a standard white shirt and a pair of white jeans, a size or two too big for my boyfriend so we could get that bunched look when he wears them. To conserve dye, I cut the pants off at the knee before dying. Then I bought two packets of “Dylon” dye in Chine Blue at my local craft store and went to town.

    image (2)

    They both came out a nice light blue color – the shirt was perfect, though the shorts were a bit light. I ended up leaving them as they were, but if you want a nicer blue for the shorts, I would recommend buying a third packet of Dyson dye and doing them again.

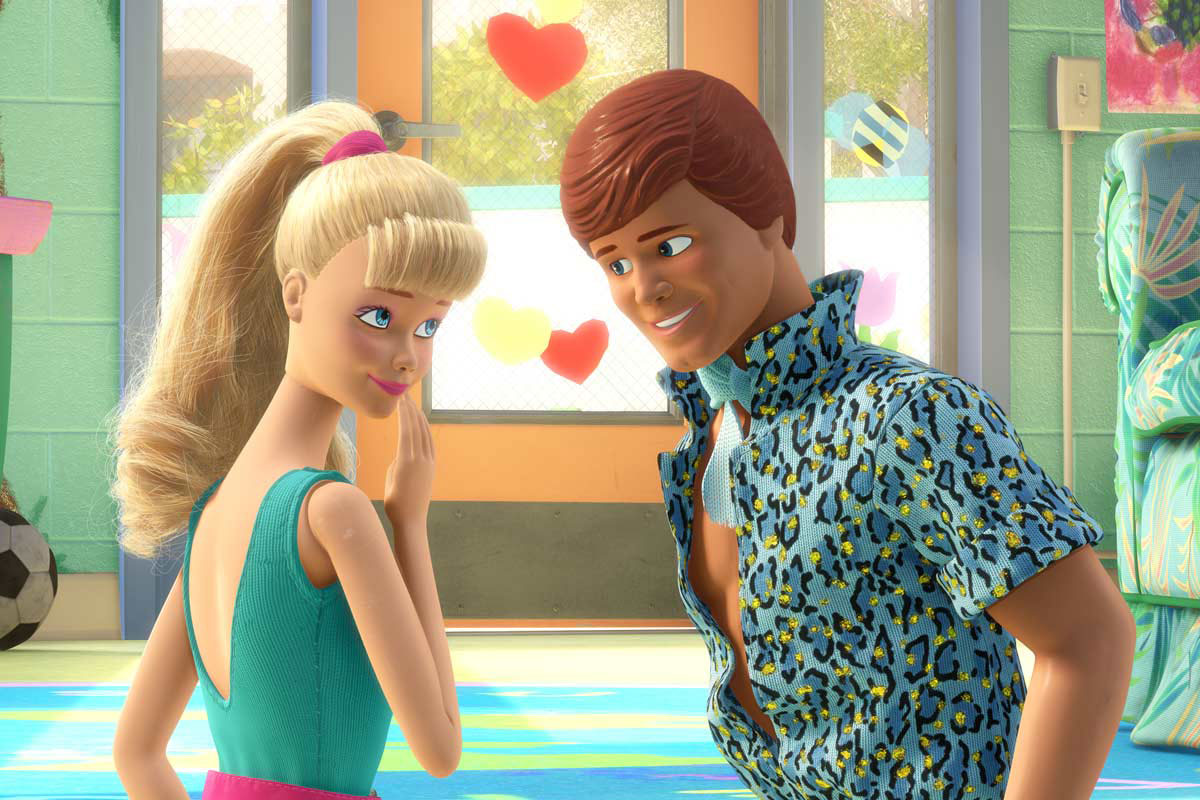
    Then, start painting the shirt! I used fabric paint I bought from Joann’s, matching the colors as closely as I could. First I started with the blue spots, making them irregular and funky and covering the front of the shirt entirely. Make sure you place a piece of cardstock or something similar between the layers of shirt so it doesn’t bleed through or stick to itself when the paint dries.

    image (1)

    Let that layer dry, then add the black spots! Another round of drying and you can add the little gold embellishments. It takes forever, so make sure you watch something on TV while you do it.

    image (3)

    Done! And to be honest, it looks much better than anything you’d be able to find online. There’s nothing wrong with using an existing blue cheetah print shirt, but painting it yourself looks so legit!

    Repeat the same steps on the back of the shirt, and make sure to get both the inside and outside of the collar, since you’ll be popping it like you’re at a college frat party.

    As for the shorts – regardless of whether you used pants or shorts, you’ll need to roll up the bottom hem to create that folded over look Ken has. It should stay on its own, but if it’s being difficult, throw a quick little stitch in the sides and it should be fine. You also might want to stitch in the “pleats” at the top, if the belt doesn’t quite hold the shape alone. This is something you’ll want to do while the shorts are being worn (to make sure they still fit after taking them in), so it’s kind of a two person job.

    image copy 3

    Next was the belt. I think what Ken actually wears is technically a leather belt, but finding a solid rectangle belt buckle on a leather belt was near impossible so I just went with this military style canvas belt in beige.

    Screen Shot 2014-10-21 at 12.37.43 AMI used fabric paint (the same gold I used on the shirt) to paint the beige fabricy part, then painted the buckle with acrylic paint in black and yellow. Pretty straight forward, and it comes out looking like this:

    image (1) copy

    The shoes were super easy. I found this pair of leather slip-ons at Goodwill (technically Ken wears boat shoes, but this just seemed so much easier to paint and I don’t think anyone will notice).

    image

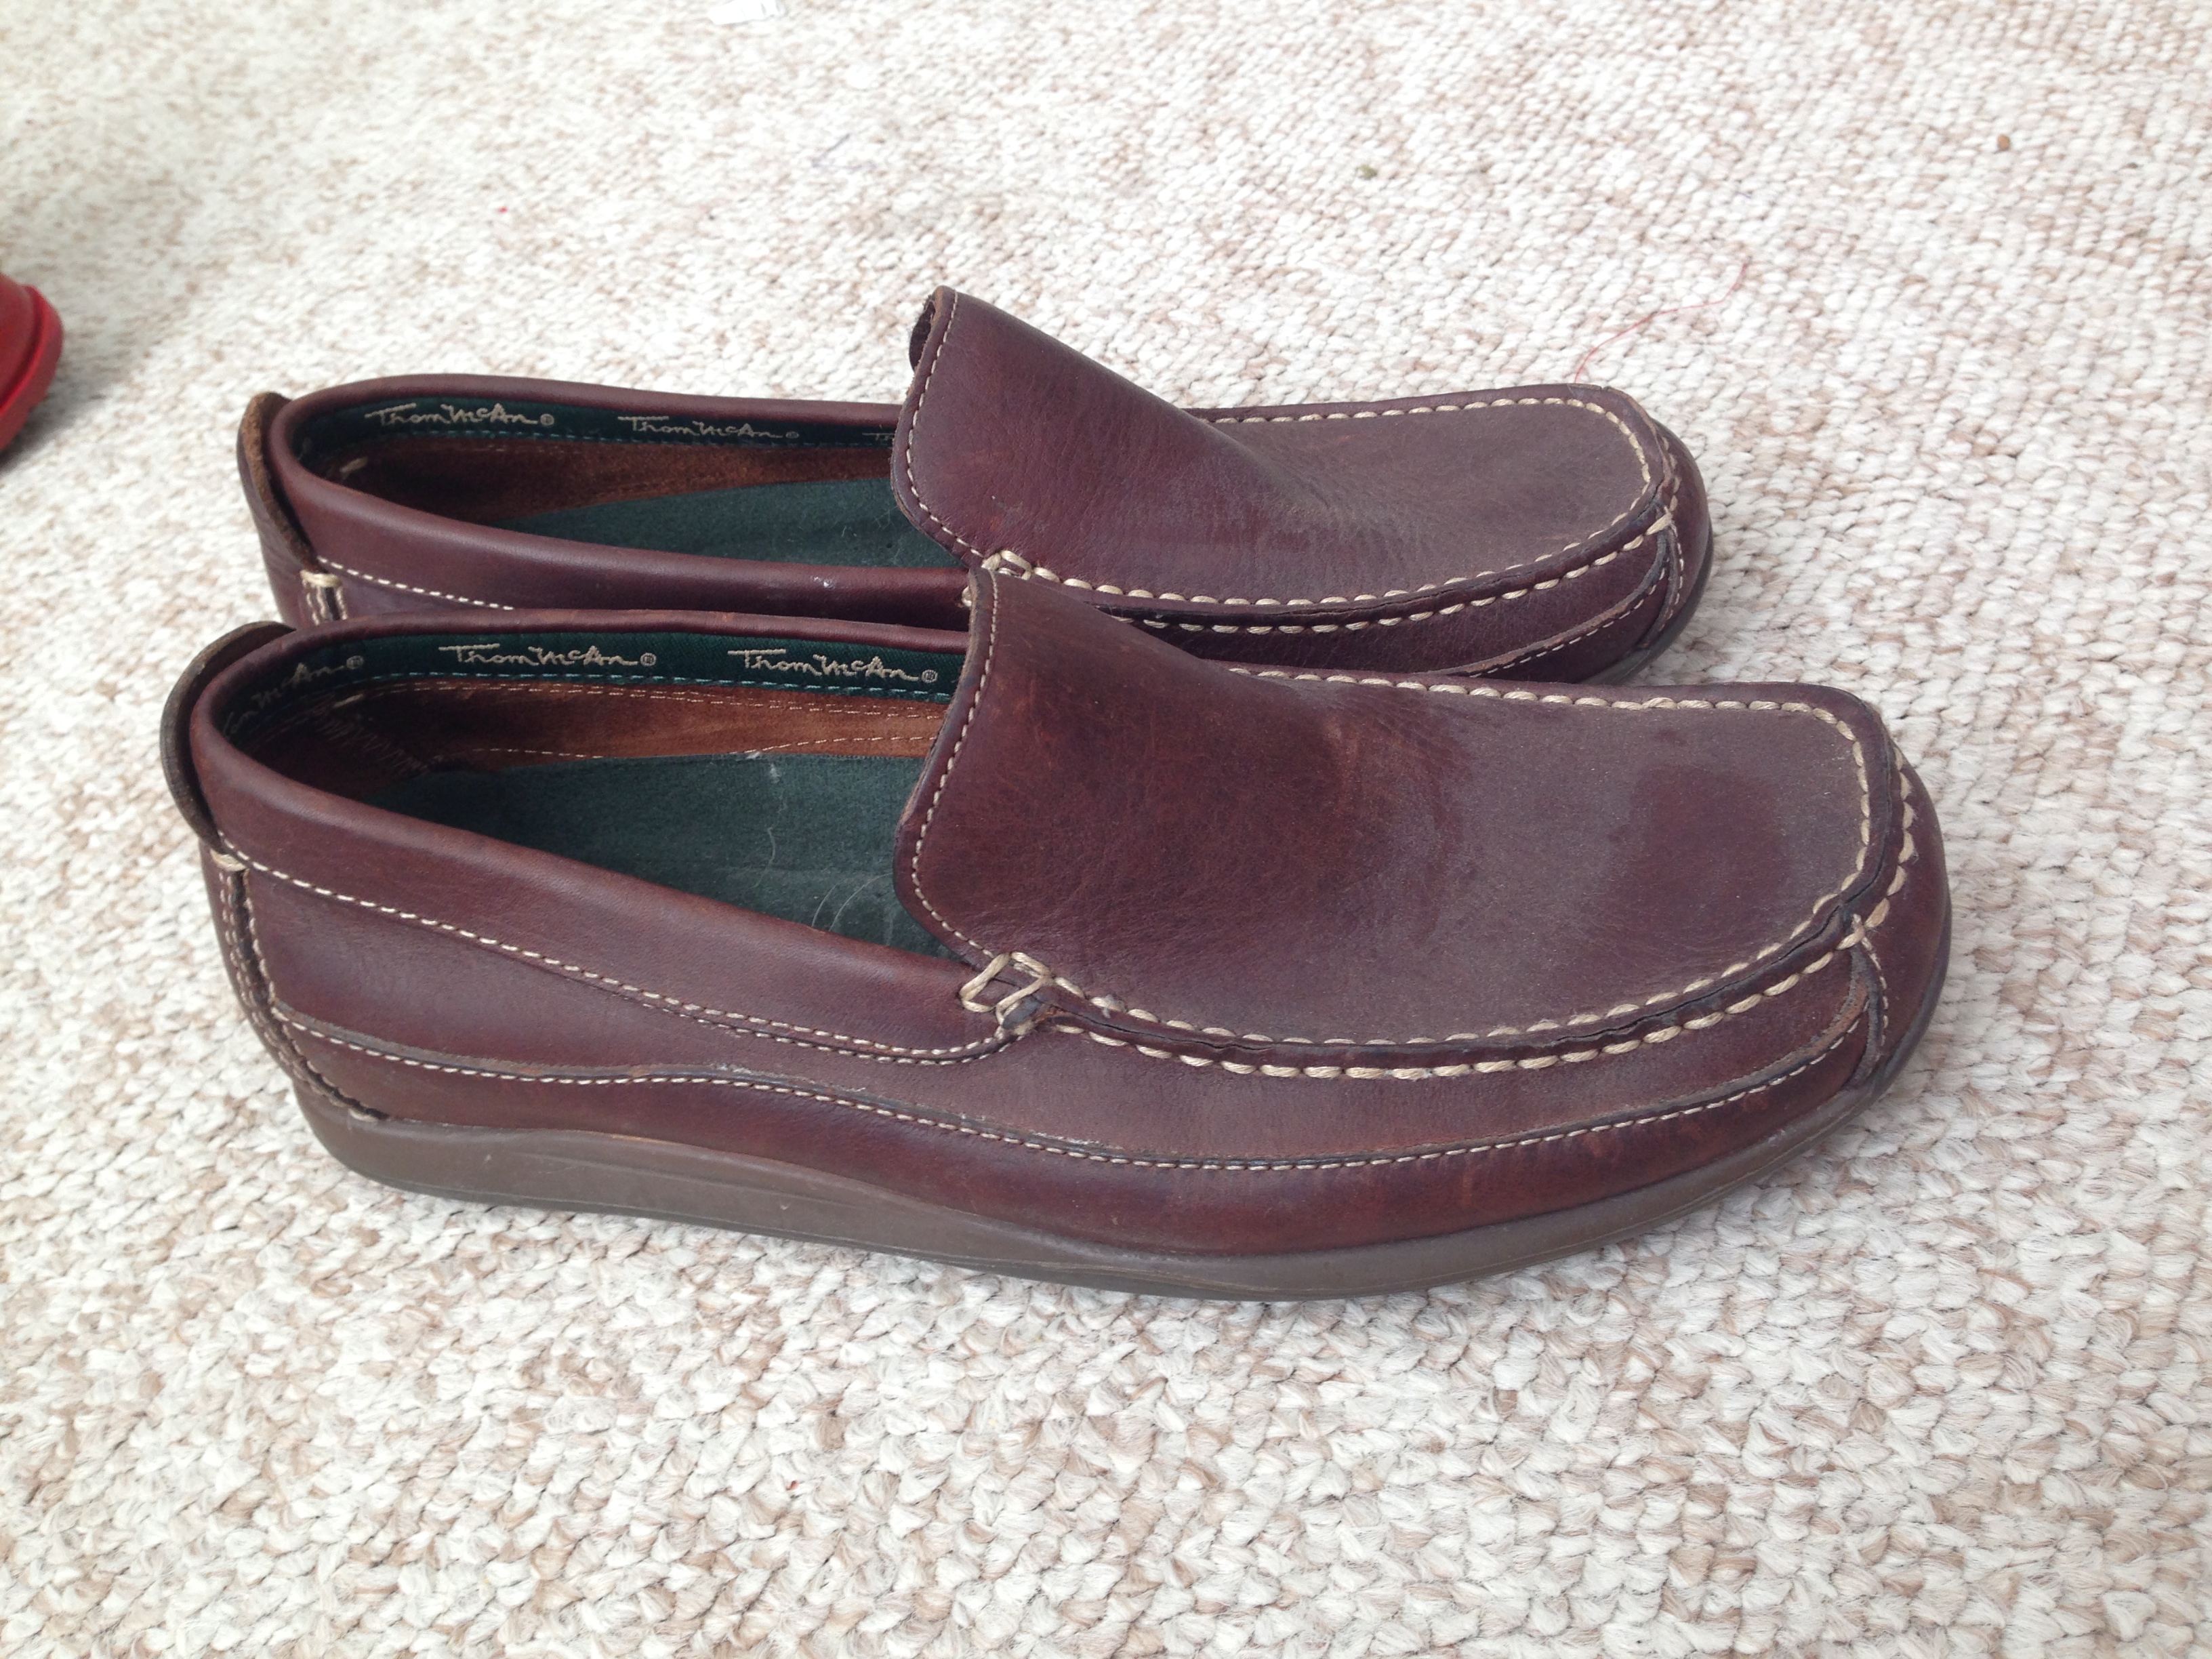
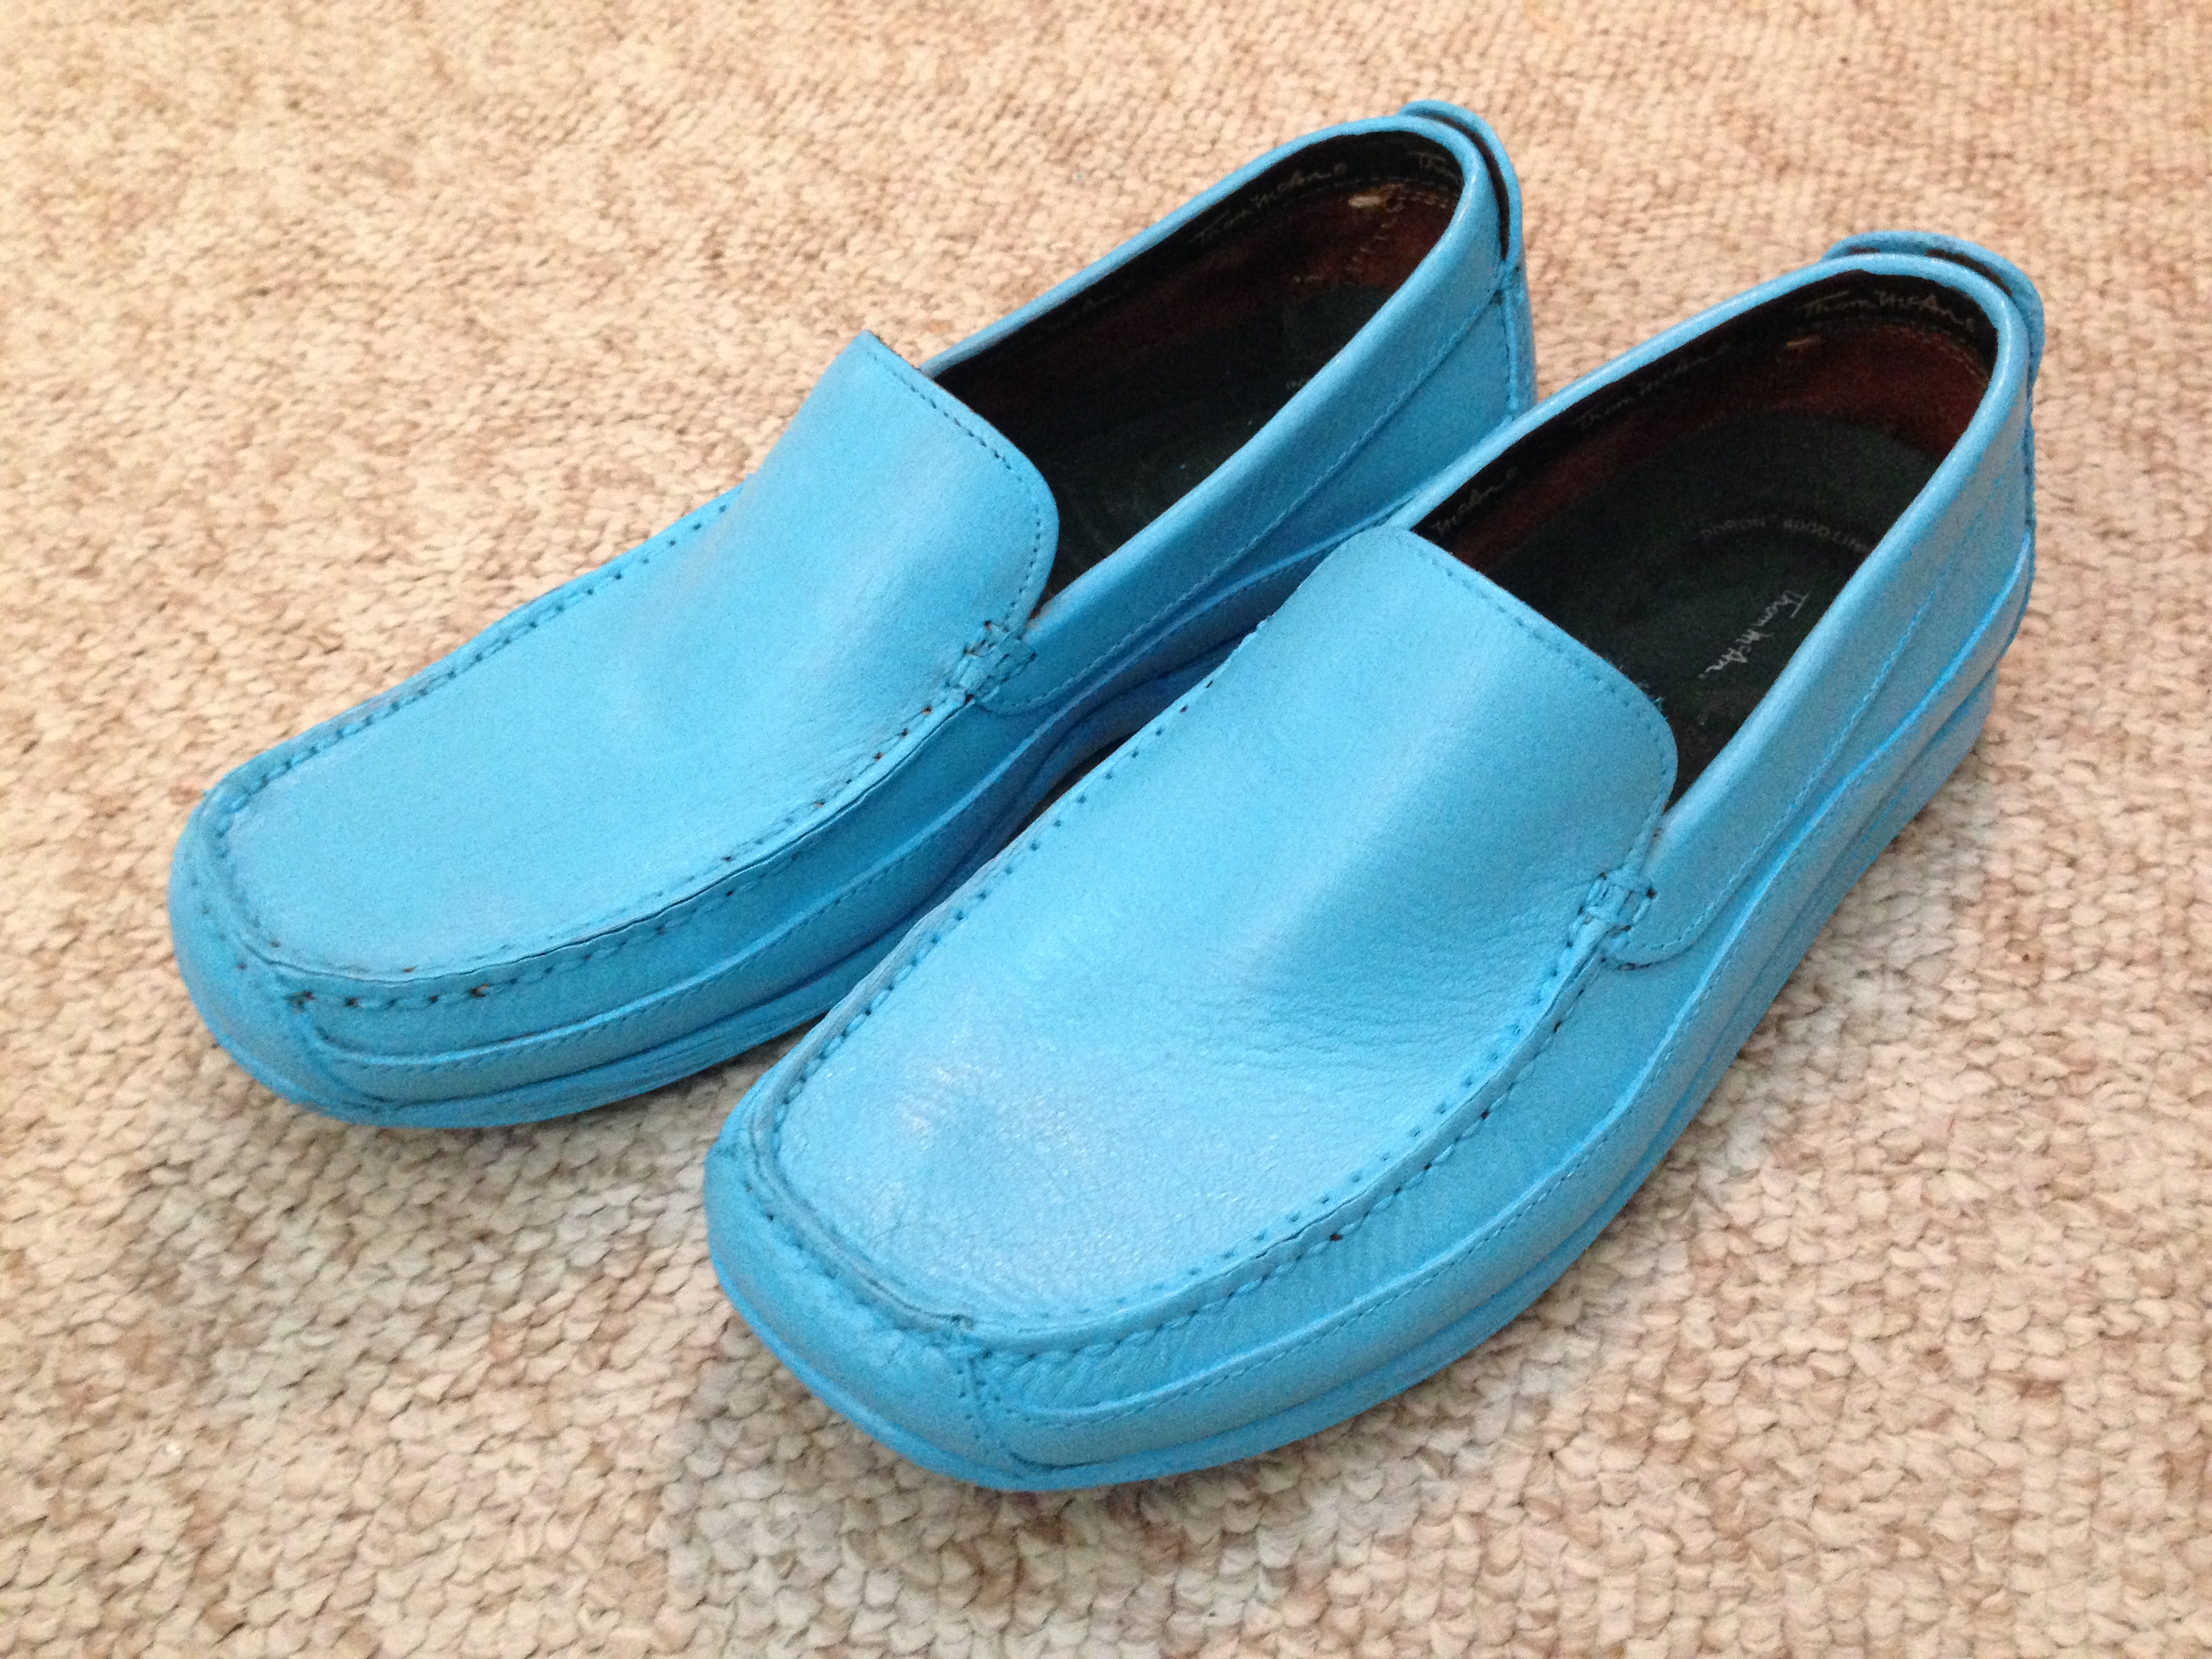
    Then I purchased a 4oz bottle of “Pale Blue” leather paint from Angelus Direct. I was worried the color might be too bright, but again, it was pretty near perfect. I’ve done shoe painting for costumes before and it usually takes 4-5 coats, but these shoes only took 2. After 2 coats, they looked solid, perfect, amazing. Also, as a tip, I prefer a sponge brush for painting leather.

    image copy 2

    Of course, the finishing touch is the ascot. Or the “regular blue neck scarf”, as I found it to be while researching, since an ascot is actually something entirely different and Barbie lied to you. You can make one yourself by purchasing a bit of silky blue fabric and tying it around your neck – or, if you want to just grab it online, you can buy this ladies neck scarf on Amazon and then just pretend it was always made for a male children’s toy.

    Barbie and Ken Toy Story Costume

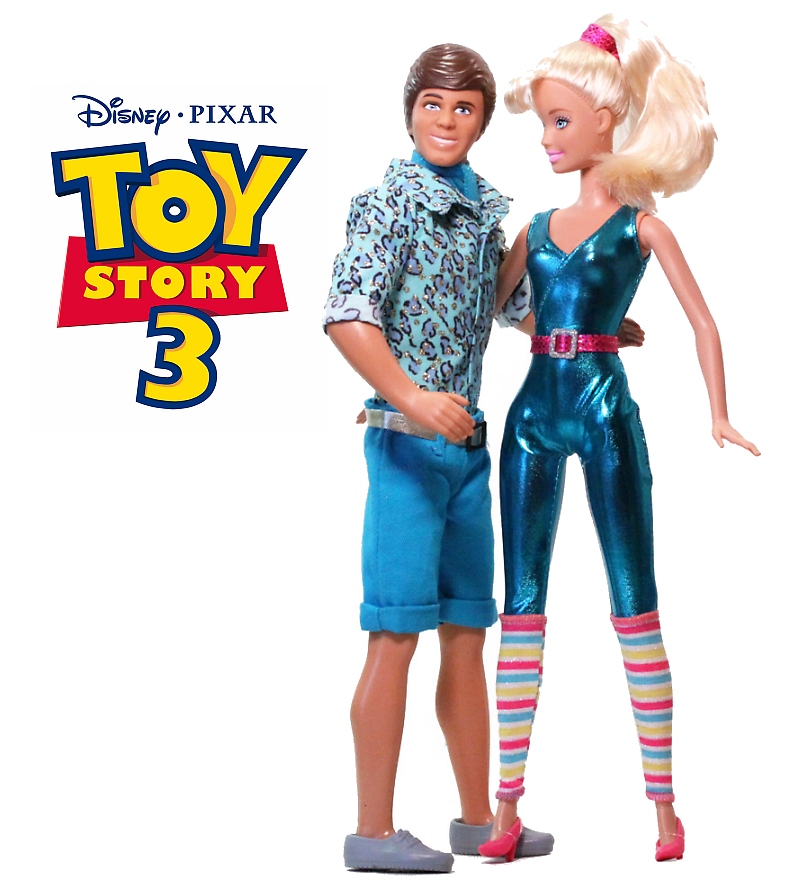
    Here’s the final product! Barbie and Ken for Halloween 2014.

    And that’s it! Good luck with your own Barbie and Ken costumes, and send me a picture of your finished product if you used this tutorial! Happy Halloween! (or cosplay or Disneybounding, I suppose!)

    Leave a comment!
  2. I Made This: Beef Stroganoff!

    November 6, 2013 ♥ Posted in: Food, Kristina Makes Things by Kristina Horner

    Hello again, my bright and bushy tailed students. I am your ignorant and broke twenty something blogger posing as a teacher… let’s begin. On the menu today is Beef Stroganoff. One of my favorites.

    I know next to nothing about cooking meat, so I decided it’s a darn good time to learn. Rather than cheating and using ground beef, as lots of recipes suggest, I went full on loin steak, guys. I took it to the next level.

    Ingredients:

    • 1 package of egg noodles
    • 2 tablespoons of butter
    • 1/2 onion, chopped
    • 2 cloves of garlic, also chopped
    • 1 package of mushrooms, sliced
    • 1 lb of beef loin steak, cut into small pieces
    • 1 can of beef consomme (14 oz)
    • 1/4 cup of red wine
    • 2 tablespoons of flour, as needed
    • Cold water, as needed
    • 1/2 cup of sour cream

    The first thing you do is start cooking the noodles. They take forever, so get those started first. I trust you know how to boil pasta, so you’re on your own for that one.

    Then, we start the sauce! Melt the butter in a large saucepan, then start adding the more solid ingredients. This includes the onions and garlic to start. Once your eyes start watering from the onions, you know it’s time to add the mushrooms. Cook the mushrooms for a couple of minutes before adding anything else.

    Next is the beef. Place the pieces of meat in the saucepan and cook until they start turning a bit brown. I’d guess about 3-4 minutes.

    IMG_5329

    Now come the less solid ingredients. The meat/mushroom/garlic/onion mixture probably already looks delicious, but it’s not sauce yet. At this point, mix in the beef consomme, wine and lemon juice.

    IMG_5331

    Oh no, you ruined it! That’s not what it’s supposed to look like! Just kidding – it has to get super watery before we can make it the creamy stroganoff sauce we’re used to. Trust me. This is called making something from scratch, suckas. Check that off your bucket list.

    Bring everything to a boil, and in the mean time, start making your flour/water mixture. Blend the cold water and flour in a small bowl until it’s totally smooth. IMG_5334

    This is the tricky part. Reduce the heat of your saucepan to low, and stir it constantly while slowly adding the flour-water. I found this was literally impossible to do with one person, so find someone to help you if possible. It won’t seem like you’re doing much, but this will start to thicken your sauce. Trust me. Once you’ve poured it all in, gradually return the sauce to a boil and let it cook for another five minutes, stirring occasionally.

    This is another one of those classic boring waiting parts of cooking, so this also is a good time to drink some of that wine you had to buy for the recipe. What! It’s for cooking!

    IMG_5333

    The very last step is to mix in the sour cream, but you shouldn’t do this until the sauce has had a bit of time to cool. Take your sauce off the heat, drink some more wine, and after another five minutes or so – mix in the sour cream. NOW it looks like Beef Stroganoff, right? See, what did I tell you.

    IMG_5336

    This recipe would make even your mom proud. That’s two meat dishes down – I’m on a roll! Maybe someday I’ll actually try poultry! (Let’s not get carried away though… poultry is terrifying).

    As always, let me know in the comments if you have any great tips for Stroganoff, or if you try this recipe! And feel free to tweet me pictures of your attempts! Happy cooking!

    Leave a comment!
  3. Ultimate Harry Potter Party: The Cauldron Shop

    October 31, 2013 ♥ Posted in: Food, Geek Events, Kristina Makes Things by Kristina Horner

    I’m sad to announce that this is the final entry in my Knockturn Alley party post series. The final shop we created in our living room was the Cauldron Shop, and it was made by my friend and roommate Eia Waltzer. I was super impressed with what she did with the theme – the only idea I really gave her was “fill cauldrons with food and drinks”. Great artistic direction, I know.

    But Eia is a creative mastermind, and she definitely made this corner of the party her own.

    IMG_5425

    It was pretty dark over in the Cauldron Shop, but that was purposeful. As you can see above, nearly everything in Eia’s shop glowed in the dark. She had, by far, the most popular drinks and snacks – but I’m not sure if that was due to her masterful cooking skills or the fact that we literally had a light up fountain.

    IMG_5422

    This fountain was one of my absolutely favorite party purchases. You can buy it for your next party here on Amazon, and it was really reasonably priced. We called this punch Amortencia, the love potion of the Harry Potter universe. They say Amortencia smells different to everyone who sniffs it; similarly, our Amortencia tasted different at various points of the night because it kept getting refilled with slightly different ingredients.

    Oh also, I don’t know how obvious it is – but those white things floating in the fountain are eyeballs. It just made sense.

    Both drinks at the Cauldron Shop came in punch bowls because, duh, they look like cauldrons. I don’t have a close up picture of it, but if you look at that first picture again you can see the glowing blue punch bowl on the left – that one held Unicorn’s Blood. The lights at the bottom were blue glow sticks. It was a mixture of blue Hawaiian punch and Whipped Vodka and it was delicious. Most party guests said it was their favorite.

    On to food! First up are these delicious wrapped hotdogs Eia lovingly named “Frankenweenies”:

    IMG_5417

    This is a terrible picture, I apologize – but that’s what you get when you try to photograph food in Knockturn Alley. The funny part about these little guys is that for two years now Eia has been calling these Frankenweenies… but it occurred to us this past weekend that there’s nothing “Franken” about them! They’re mummies! It’s too late though. The name has stuck, and they look creepy enough to be served at a dark wizard gathering, so they got to stay.

    IMG_5418

    I found these great little mini cauldrons at the local party store, so Eia fashioned her own version of Cauldron Cakes out of them: vanilla pudding died green, crumbled oreos, and gummy worms. Don’t pretend like that doesn’t sound AMAZING.

    IMG_5416

    I believe Eia’s greatest conquest to be these Pumpkin Pasties. She made those cake pops entirely by hand and they were wonderful. I really appreciated the unique approach to more “common” Harry Potter treats, and it was greatly appreciated amongst party guests.

    Now that I’ve shared the entire party on this blog, I’m curious what your favorite parts were? Which shop did you like the best, or did you prefer one of the other aspects of the party more? What was your favorite reference to Harry Potter?

    I can’t tell you how much fun we had planning this party. I feel like I’ve preparing for this party ever since I was 13 and started reading these books; ever since I first fell in love with Slytherin house. The night of the party will go down in history as one of my favorite events of all time, and I only wish I could have shared it with ALL of the Harry Potter friends I have made over the years.

    Thanks for following along as I recounted the experience, and I hope you’ve been inspired to throw your own themed parties. Themes parties are the best parties.

    Also, before I end this party series forever, I feel like it’s prudent to admit that somehow, a party guest dressed as DUMBLEDORE won the costume contest. No joke.

    I guess good really does always triumph over evil. Humph.

    Leave a comment!
  4. Ultimate Harry Potter Party: The Spiny Serpent

    ♥ Posted in: Food, Geek Events, Kristina Makes Things by Kristina Horner

    Hey guys! Rather than try to figure out her vision myself for this post, I figured it would be better to give you guys the real deal. I introduce to you my friend and roommate Liz Leo, the mastermind behind the Spiny Serpent portion of our Knockturn Alley party.

    Welcome, welcome to my shudderingly sinister shop the Spiny Serpent! Don’t be scared- step right this way…*

    IMG_5435

    The Spiny Serpent is home to all things creepy, crawly, and scaly. You simply can’t find stock like this anywhere else in the wizarding world. We have your spiders. We have your maggots. We have your miniature poison-egg-laying dragons (perfect for brunch with ex-boyfriends).

    IMG_5433

    A regular here at the Spiny Serpent, Mr. Dungeon Troll (his parents weren’t very original), once told me a story about how a pesky boy wizard stuck a wand up his nose when he was just trying to go to the bathroom during a Halloween party. We decided to honor his tale with a pretzel and dip delicacy (the dip featured here is cheese, as we ran out of real bogeys just moments ago).

    IMG_5432

    We have scores of dragons that lay all sorts of pernicious confections. Some eggs make perfect smoke bombs to be used for sneaky escapes. Others contain scrolls that predict the future. These- well these are chicken eggs that I hard boiled, gently cracked the shell, and soaked in red and black food coloring for a few hours- I tend to save the real dragon eggs for higher paying customers.

    IMG_5429

    Maybe window shoppers like yourself might be more interested in some dragon scales and goblin blood- only a knut a scoop. Our dragons shed like mad in the summer, so we sell the scales by the bag all autumn long. However in a pinch blue tortilla chips and verde salsa will get you through a dry spring.IMG_5431Finally, if you’re like me and you spend a large portion of your time wrestling giant flesh eating slugs away from your nursery of carnivorous shrubs, sprouts, and seedlings, then you’ll be needing this drink to take your mind off of your struggles. This “Flesh Eating Slug Repellant” features margarita mix spiked with tequila, limeade, and ginger ale- plus the salt around the rim will make sure the slugs don’t go for your flesh as well. (Oh, and please forgive our signage’s spelling error. Our house elf Winky must have gotten into the sauce before practicing her penmanship.)

    Hmmm- so you won’t be purchasing anything after all? I see how it is. I can’t say I’m surprised, as business here in Knockturn Alley is always slow- most people only tend to come here by an accidental sneeze anyway. Well, regardless, thank you kindly for visiting my shop. And in case you’ve found the ramblings featured here witty, waggish, or whimsical in any way please feel free to stop by my blog, where I’ve set up shop during the rest of the year. I’m sure I’ll see you again soon.*

    *cue ominous music

    Leave a comment!
  5. Utimate Harry Potter Party: Borgin & Burkes

    October 30, 2013 ♥ Posted in: Food, Geek Events, Kristina Makes Things by Kristina Horner

    The largest shop at our Halloween party was Borgin & Burkes, naturally, as it’s the only Knockturn Alley shop we really know anything about. For some reason our house has a built-in bar, so we designed this shop around it. Technically it was assigned to my roommate Justin, but it was more a collaboration between all of us.

    IMG_5437

    The idea was to have food in the front, and a museum of artifacts “for sale” in the back.

    IMG_5446

    Each of the dark artifacts had a tag on it with the name and a price. Some were things we happened to have sitting around the house already (like the books and creepy picture frame and hourglass) while others we either purchased specifically for the event (ie. George’s ear) or entirely made from scratch.

    IMG_5445

    This hand of glory was made by my roommate Liz. She worked on it for days, creating the entire thing out of popsicle sticks, hot glue, paper mache, acrylic paint and wax. You can read her hilarious and disturbing tutorial here. The red display pillow we happened to find at a consignment store on the same day as the party, which was exactly the sort of luck we kept running into throughout most of the party-planning process.

    IMG_5442

    Eia created this pensieve. The concoction inside is a mixture of almond milk, blue food coloring that we took care not to mix too thoroughly, and fine glitter. If you create a pensieve for your own party, please make sure your guests don’t confuse it with another punch bowl!

    Next up were the food and drinks for Borgin & Burkes. We went pretty dark with everything at this station, which was surprisingly fun for creating snacks. Every party needs chips and dip, so that was an easy one.

    IMG_5441

    One of my all time favorite party foods is stuffed mushrooms, which are inherently creepy looking. Those were a hit and instantly fit at the Borgin & Burkes spread. I forgot to put a tag on these ones, but I thought they looked a bit like mandrakes:

    IMG_5440

    And finally, the drinks. No wizard party would be complete with Firewhiskey, and I also really wanted to create a drink for Draught of Living Death:

    IMG_5439

    The firewhiskey was just Fireball whiskey (no use making it more complicated than it needed to be), while the Draught of Living Death was a bit more on the fancy side. We used drop shot cups with cranberry juice on the outside, and black Blavod vodka on the inside. It’s pure black! It absolutely had that creepy, foreboding look – but was quite popular with the guests.

    I really loved that our party guests all took the time to walk through and take in the detail we put into each shop, and Borgin & Burkes was definitely the most exciting one for crafts and artifacts. I love the scene in Chamber of Secrets when Harry mistakenly ends up here and wanders through some of the creepier things on display, so we wanted to try and recreate that feeling. Let me know your thoughts in the comments, and stay tuned for the remaining two shops!

    Leave a comment!
  6. Ultimate Harry Potter Party: Apothecary

    ♥ Posted in: Food, Geek Events, Kristina Makes Things by Kristina Horner

    The first shop from our Knockturn Alley party that I am going to highlight is the Apothecary – which is the one I made! I have always loved Halloween spreads that include a bunch of creepy glass jars and vials, so I called dibs on this one to give that idea a wizardy potion bottle twist. Here’s what I came up with:

    IMG_5392

    My shop focused a bit more on decorations than most of the others; I wanted to give the table the illusion of a pretty tea party that wilted and rotted after years of neglect. I was able to use a lot of things we already had in our house, actually. The tattered bunny was a leftover prop made for a costume I wore to a horror movie party, the doll with the bleeding eyes was actually Liz’s from the dinner party we went to last week. My favorite prop made specifically for this party, however, was the “doll in a jar”. I was inspired by watching a few two many episodes of American Horror Story:

    IMG_5396

    The candy wands were kind of an afterthought, to be honest. I bought a tin of Pirouettes because they have that tea party feel, and realized as I was setting them out that they could double as wands. That’s the fun of throwing a themed party like this: the Harry Potter universe is so expansive that it’s really fun and easy to tie in just about anything.

    Keeping up with crafts, here’s the array of potion bottles I made:

    IMG_5404

    You’d be amazed how much of this stuff is entirely normal household items! From left to right we have sliced peaches in a light syrup, then the Eye of Newt bottle has yellow dyed water with sugar babies at the bottom to look like eyes. Next the fancier bottle has chopped up cauliflower stems in blue dyed water, and the Dragon Blood vial is simply Orange Crush soda. Second to last is an actual non-edible slime mixture, and finally the largest jar has cauliflower stalks and beef broth (which I thought looked a bit like cat brains).

    Now that you’re good and hungry (haha) let’s move on to food!

    IMG_5402

    These pastries ended up being kind of a mistake, but they worked out just fine in the end and were delicious as well! I meant to make little pastry purses but they all ended up opening while they were baking. That was just fine though – I thought the blueberries wedged inside the flaky casing made them look like a sort of poisonous plant, so Venoumous Tentacula they became!

    IMG_5399

    I was quite proud of the drinks at my shop: This first one came in these lovely test tube vials and were dubbed Veritaserum. The potion is always described as colorless, but I still wanted to do something fun with it, so I created a raspberry vodka and tonic water mixture (because tonic water reacts under blacklights). You can’t quite tell in this picture, but these drinks were a perfect addition to the glow theme at the party (and were quite popular for it). You can get the test tubes and rack here on Amazon.

    Next up was the Polyjuice Potion. I was quite proud of this one:

    IMG_5398

    Just short of putting actual bits of things in the shots (no one wants to drink anything that has pieces of hair or fingernails in it, even on Halloween) we wanted to create a texture that still looked chunky enough to be Polyjuice Potion. These jello shots were a labour of love, creating three different colors of jello and spooning them into the cups separately after letting them firm up a bit. I used this recipe as a guide (though as cooking usually goes, they turned out a bit differently).

    Needless to say, the Polyjuice Potion was another popular item during the party, though we did hear they were quite strong. Whoops!

    So, that was the Apothecary! There are still three more shops to feature, so please look out for those. I’m more than curious to hear your thoughts, and let me know if you’d like the recipes for any of the food items mentioned above!

    Leave a comment!
  7. Ultimate Harry Potter Party: Knockturn Alley

    October 29, 2013 ♥ Posted in: Geek Events, Journal, Kristina Makes Things by Kristina Horner

    So, I have been hinting about this online for weeks – but my roommates and I have been tirelessly working on an epic Halloween party we threw at our house. I’m talking party committee meetings, organized shopping trips, and scheduled craft nights. We host a Halloween party every year, but this year… we went ALL out. Being a house full of Harry Potter fanatics, we decided it was time to give our party the ultimate theme: Knockturn Alley.

    Upon arriving at our house, the first thing guests were greeted by was this flaming fireplace doorway and bucket of Floo powder. Our door is naturally lime green, so it felt only right that it would be connected to the Floo network. Wizards could shout “Knockturn Alley!” and throw a handful of sand, while unassuming muggles would mispronounce Diagon Alley as “Digonelly!” and show up in the same place.

    IMG_5407

    Once inside, all guests were encouraged to put their name in the Goblet of Fire. We didn’t tell them why initially (just that they might be “chosen”), then random times throughout the night my roommate Justin (dressed as Voldemort) shown a dark mark symbol on the ceiling and drew names of guests from the goblet.

    IMG_5388

    These selected guests would then become Death Eaters and would receive a green wrist band. Guests with wrist bands got special treatment (ie. prizes) throughout the evening.

    IMG_5389

    To get down to where the party was, party-goers were encouraged to follow the spiders. A trail of spiders led all the way down the stairs, down the next hallway and into the living room.

    IMG_5391

    IMG_5414

    Then in the living room, we created the illusion of the dark and creepy Knockturn Alley by covering everything in black tablecloths and shining a green floodlight across the room. Each corner had a separate “shop” with its own sign, theme, decor, food and beverages. The four shops we chose were actual ones from Knockturn Alley: of course we had Borgin and Burkes; this was the main and largest shop that took place at our built in bar. Next was the Spiny Serpent (which we know very little about from the books) so we turned it into a bestiary. The Cauldron Shop was next, which had food and drinks of and pertaining to all things cauldron-related. The final shop was the Apothecary, which mostly had interesting drinks as well as an assortment of creepy potion inspired decorations.

    I will have blog posts up about each of these individual shops in the next couple of days (that I will eventually link to from this post) so please keep an eye out for that!

    My favorite aspect of this party was that everything was supposed to be dark, creepy, and relatively colorless. Except, of course, for the drinks (to represent potions, and a wizard party, of course). We installed four black-lights around the living room, and used UV reactant cups as well as flashing plastic “ice cubes” for the drinks, so once guests started mingling and dancing and drinking, it kind of turned into a dark wizard rave. The image of a dark, foggy room filled with people in fantastic dark wizard costumes with only glowing drinks for lights was a pretty intense, amazing visual theme for the party; one I am quite proud of. It worked even better than we could have planned.

    There’s so much more I want to share but I will save it for the next blog posts; in closing I will leave you with the creepiest aspect of the party: the bathroom.

    IMG_5522

    Maybe it’s the Slytherin in me (sorry guys – newly sorted Hufflepuff or no, there will always be an element of Slytherin in my bones) but I really wanted to make people regret going to the bathroom. So we did this to our shower:

    IMG_5521

    I tied it in by saying the brain was one from the Department of Mysteries… but even I’ll admit that was a stretch. I just wanted to freak people out.

    It was a fantastic night, everyone seemed to have a lot of fun, and I was so thankful for all of the help I had in pulling it off. My roommates were absolutely amazing in helping get everything ready, as were a handful of my friends who came over early to help us finish setting up.

    IMG_0247

    My roommates! Liz as a shop keeper, Justin as Voldemort, myself as Narcissa and Eia as the Grey Lady.

    I don’t know if I’ll ever throw a party quite this grand ever again, but I’m pleased to be able to check it off my list. I don’t know if other people have thrown Death Eater or Knockturn Alley parties before but we had so much fun scouring the books for ideas. I’m curious to know your thoughts, as I know many of the people who read my blog are also huge Harry Potter fans! How did we do?

    Leave a comment!
  8. I Made This: Roasted Pumpkin Seeds!

    October 28, 2013 ♥ Posted in: Food, Kristina Makes Things by Kristina Horner

    I’m not even going to be bashful about this one – I am awesome at roasting pumpkin seeds. I learned how to make them from my mom years ago, and now I’m always that drill sergeant during pumpkin carving barking at everyone to “save your seeds!” It’s well worth it though, because no one seems to complain much when we have a huge amount of roasted seeds on the counter for the week around Halloween.

    IMG_5524

    Making seeds is super easy. This is all you will need:

    • Freshly scooped out pumpkin seeds
    • Olive oil
    • Johnny’s Seasoning (or sea salt)
    • Parchment or wax paper

    When you’re carving your pumpkins, keep two bowls out: one for guts, and one for seeds. Sorting them as you go is a lot simpler. After you’ve completely finished your lovely pumpkins (one thing at a time here) take the seeds into the kitchen and pick out any remaining bits of pumpkin guts. This step is obnoxious, but pretty important.

    Next, dump your seeds in a strainer and run them under cold water. This will help make them less slimy and should separate any pumpkin that you might not have caught. Once they’re as clean as you can get them, pat them dry with a paper towel and prepare your baking pan.

    I lined a pan with parchment paper, as see above. Then drizzle olive oil on the paper before dumping your seeds on top, making a single layer covering the entire sheet. Add a bit more olive oil on top, then sprinkle the entire sheet with Johnny’s seasoning (or your favorite substitute – you may also use sea salt, garlic salt; anything!)

    The whole tray goes into the oven at 325 degrees F for about 20-25 minutes, or when they seeds get nice and crunchy. Remove them from the tray and enjoy! They’re particularly good while warm.

    IMG_5526

    How do you cook your pumpkin seeds? Or are you one of those people who (gasp) throws them away? Let me know in the comments!

    Leave a comment!
  9. I Made This: Meatloaf

    October 16, 2013 ♥ Posted in: Food, Kristina Makes Things by Kristina Horner

    In today’s installment of “Kristina the snarky chef makes things, sort of,” (it’s a working title), we’re going to make meatloaf. Because I thought, “hey, meatloaf is delicious and seems not super hard. Why not?”

    I’m going to preface this post by saying, why the heck does meatloaf have such a bad rep? I feel like most people stick it in the same category as brussels sprouts and mayonnaise (both of which are delicious, by the way) where people turn their nose up at it out of habit, but really, most people actually sort of love it. So, I decided to conquer my fear of cooking meat today and give it a go.

    Here’s what you need:

    1. 1 1/2 lbs of lean ground beef
    2. 1 cup bread crumbs (I used a seasoned variety, but use whatever you want)
    3. 1 egg
    4. 1/2 an onion
    5. 1 cup milk
    6. 2 tablespoons brown sugar
    7. 1/3 cup ketchup
    8. 2 tablespoons BBQ sauce
    9. salt and pepper

    Let me just say – cooking meatloaf is FUN. You stick a bunch of random stuff in a bowl, squish it around with your fingers, build a bust of yourself out of the gooey substance… unbuild the bust of yourself, and finally just sort of shove it all in a cooking pan. So easy. It’s like playing with play-doh, but even more delicious. I mean look at this:

    IMG_5316

    In this bowl, you mix the ground beef, egg, milk, bread crumbs and salt/pepper until it looks like Meatwad from Aqua Teen Hunger Force. In the mean time, you should chop up and sauté the onions until they’re cooked-ish, otherwise they’ll be a bit too crunchy in your meatloaf.  My roommate Liz thought it would be funny to organize the sautéing onions into a heart shape for you guys:

    IMG_5315

    Dump the onions into the meatloaf, and then mix it again. Careful touching it with your hands, as the onions are hot. Set the completed mixture aside for awhile while you prepare the final step, the sauce. Mix the ketchup, brown sugar and a couple spoonfuls of your favorite BBQ sauce in a small bowl.

    IMG_5317

    Once it’s smooth, you can arrange the meat mixture in your baking loaf tray (5×9″ works best) and then dump the sauce evenly across the top. Yeeeeah meatloaf!

    IMG_5319

    Stick the whole thing in the oven for about one hour at 350 degrees F. To check if it’s done, just cut into it. If it’s still pink on the inside, put it back in the oven for another 5-10 minutes. Or eat it raw, vampire. I’m on to you.

    When it’s done, combine it with other wholesome “family” type foods, and trust me, you’ll super impress your grandma once you put photos online. As long as she has Facebook. Your grandma has Facebook, right?

    IMG_5321

    Let me know if you have any suggestions for other easy foods for me to try! Also, let me know if you try any of the recipes I post on my blog, and send pictures! I would love to see them.

    Leave a comment!
  10. I Made This: Avocado Bagel

    October 11, 2013 ♥ Posted in: Food, Kristina Makes Things by Kristina Horner

    Okay, I’m about to share with you my secret favorite snack. This is a huge deal, as it has secret in the title and that means no one else knows about it. Except I guess Instagram, since I posted a picture of it one time. The food item we will be making today is the Avocado Bagel.

    Just to clarify, this isn’t an avocado flavored bagel (though how cool would that be?!) because I am not that caliber of chef; I can’t infuse the flavor of one delicious food into another, no matter how awesome that would be. No, what we’re doing today is putting avocado on a bagel, which sounds simple, yes – but if it’s so simple, why haven’t you thought of it before?

    IMG_5312

    Ingredients you will need:

    1. A bagel
    2. Plain cream cheese 
    3. 1 avocado
    4. Seasoning of your choice

    First toast the bagel to your liking. I can’t stand when my bread gets even the slightest bit burnt, but to each their own. I guess the toasting settings wouldn’t go all the way up to 10 if no one used them, right? Anyway, stick the bagel in the toaster and let’s stop getting off track.

    Next you should cut your avocado open by cutting it lengthwise. You’ll only need half, so stick the side with the pit (it helps it keep longer!) in a ziplock bag or tupperware and toss it back in the fridge for tomorrow. Or make guacamole; you’re a grownup, you can do whatever you want.

    Once the bagel is toasted, spread cream cheese on it evenly, then place pieces of avocado on top, cut into strips or cubes or however you want. Then, top if off with your favorite seasoning. I like Johnny’s Seasoning Salt (it’s sort of an all purpose seasoning) but you can use garlic or an italian seasoning or whatever you want. That’s all there is to it!

    This is such an easy afternoon snack, and it’s relatively healthy. I hope you enjoy it!

    Leave a comment!